• Give & Join
  • Renew
    • Renew Your Membership
    • Member Circles and Benefits
    • Student Membership
    • Give a Gift Membership
    • More Ways to Help
    • Update Your Information
  • Take Action
    • Volunteer Program
    • Make Your Voice Heard
  • About
    • What We Do
    • Annual Reports
    • Position Openings
    • Team & People
    • Partners & Friends
    • Policies & Financials
  • Things to Do
    • Events
    • Archaeology Café Online
    • Exhibits
    • Classes
    • Field School
  • Explore
    • Free Resources
    • Introduction to Southwestern Archaeology
    • Projects
    • Protection Efforts
    • Ancient Cultures
    • Videos
    • Places to Visit
  • Store
    • Archaeology Southwest Magazine
    • All Products
  • News
    • Blog
    • Press Releases/Announcements
    • Preservation Archaeology Today
    • Sign up for E-News
  • Give & Join
  • Renew
    • Renew Your Membership
    • Member Circles and Benefits
    • Student Membership
    • Give a Gift Membership
    • More Ways to Help
    • Update Your Info
  • Take Action
    • Volunteer Program
    • Make Your Voice Heard
X
  • About
    • What We Do
    • Annual Reports
    • Position Openings
    • Team & People
    • Partners and Friends
    • Policies and Financials
  • Things to Do
    • Events
    • Archaeology Café Online
    • Exhibits
    • Classes
    • Field School
  • Explore
    • Free Resources
    • SW Archaeology 101
    • Projects
    • Protection Efforts
    • Ancient Cultures
    • Videos
    • Places to Visit
  • Store
    • Archaeology Southwest Magazine
    • All Products
  • News
    • Blog
    • Press Releases/Announcements
    • Preservation Archaeology Today
    • Sign up for E-News

Hands-On Archaeology: How to Build a Pithouse

Preservation Archaeology Blog
  • Home
  • >
  • Preservation Archaeology Blog
  • >
  • Hands-On Archaeology: How to Build a Pithouse

Allen Denoyer, Archaeology Southwest, and Gary Owens, Huhugam Ki Museum, Salt River Pima-Maricopa Indian Community

(January 16, 2018)—In fall 2017, at Museum Director Gary Owens’s invitation, Allen Denoyer joined Gary’s team at the Huhugam Ki Museum at the Salt River Pima-Maricopa Indian Community to help build a new replica pithouse just outside of the museum. This is their account of the process.

This house is round in plan view. Its construction is more like that of a wickiup.

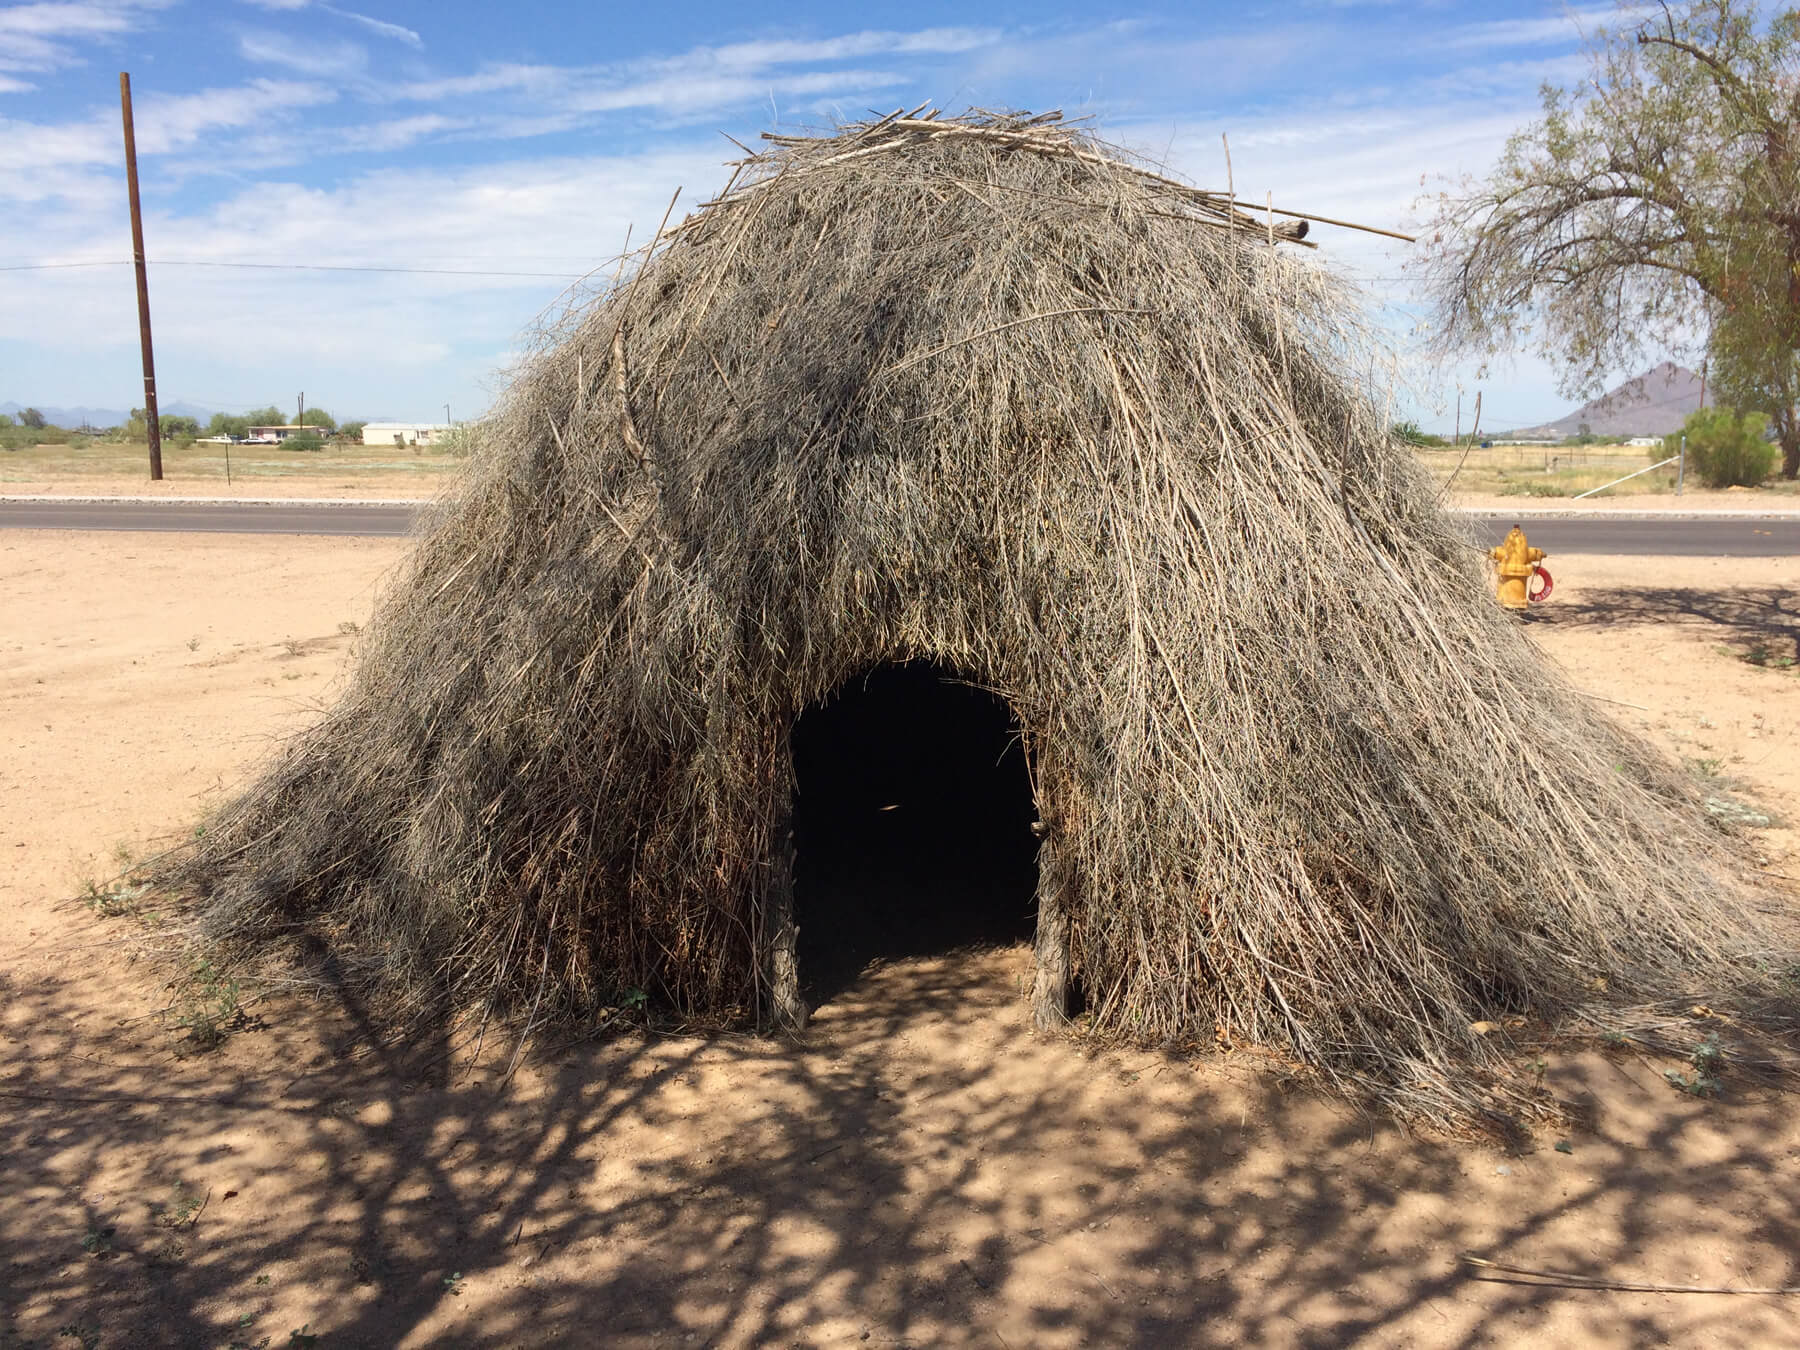
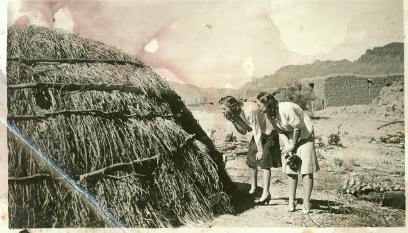
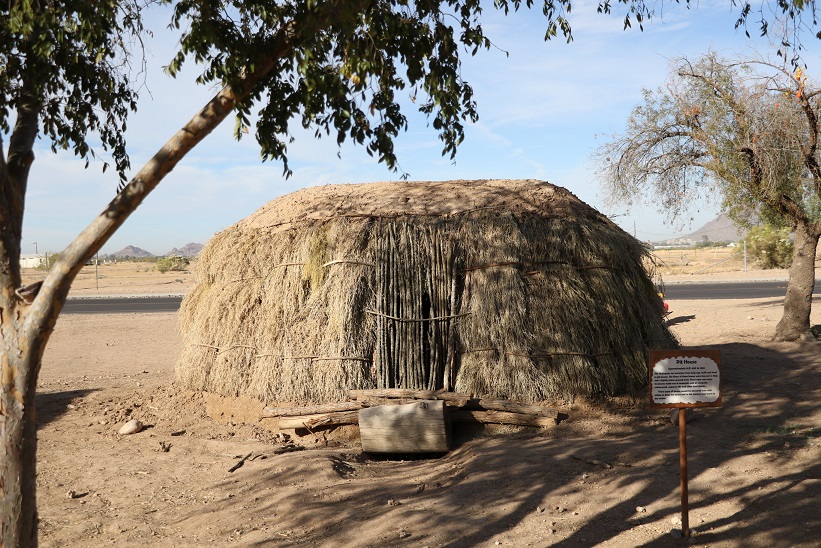
Allen: The replica dwelling pictured above was built a few years back. Because it just did not look right according to the community’s traditions, the museum planned to tear it down and reuse some of the materials to build a more accurate-looking version.

Gary: The house had been built by others, to the best of their ability, but what we eventually wanted to see was something that made us think, “Yeah, that’s what they described to me when I was little.”

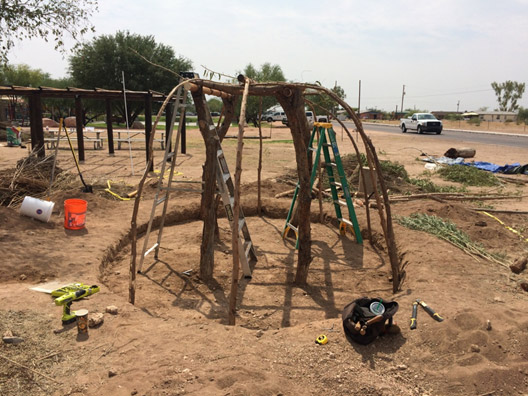
In all, we estimated about 18 hours of digging and sifting to dig about 10–14” down. Community members did the excavation, which gave them a chance to see what was really in that mound of dirt—their past.

This photo shows visitors at a historic O’odham village looking at a structure very similar to what we built.

Allen: Gary and his crew dismantled the existing house and stockpiled its construction elements for use on the new house. They began excavation of the house pit on August 26. The excavated soil was loaded with ancient artifacts and modern trash, including glass and nails. The crew screened the dirt and collected the artifacts for later analysis.

There are several reasons to dig a house pit. First, it supplies the dirt needed for the roof and berm around the house pit edge. Second, the subterranean floor conveys thermal advantages: in the summer the house stays cooler, and in the winter it is easier to keep warm.

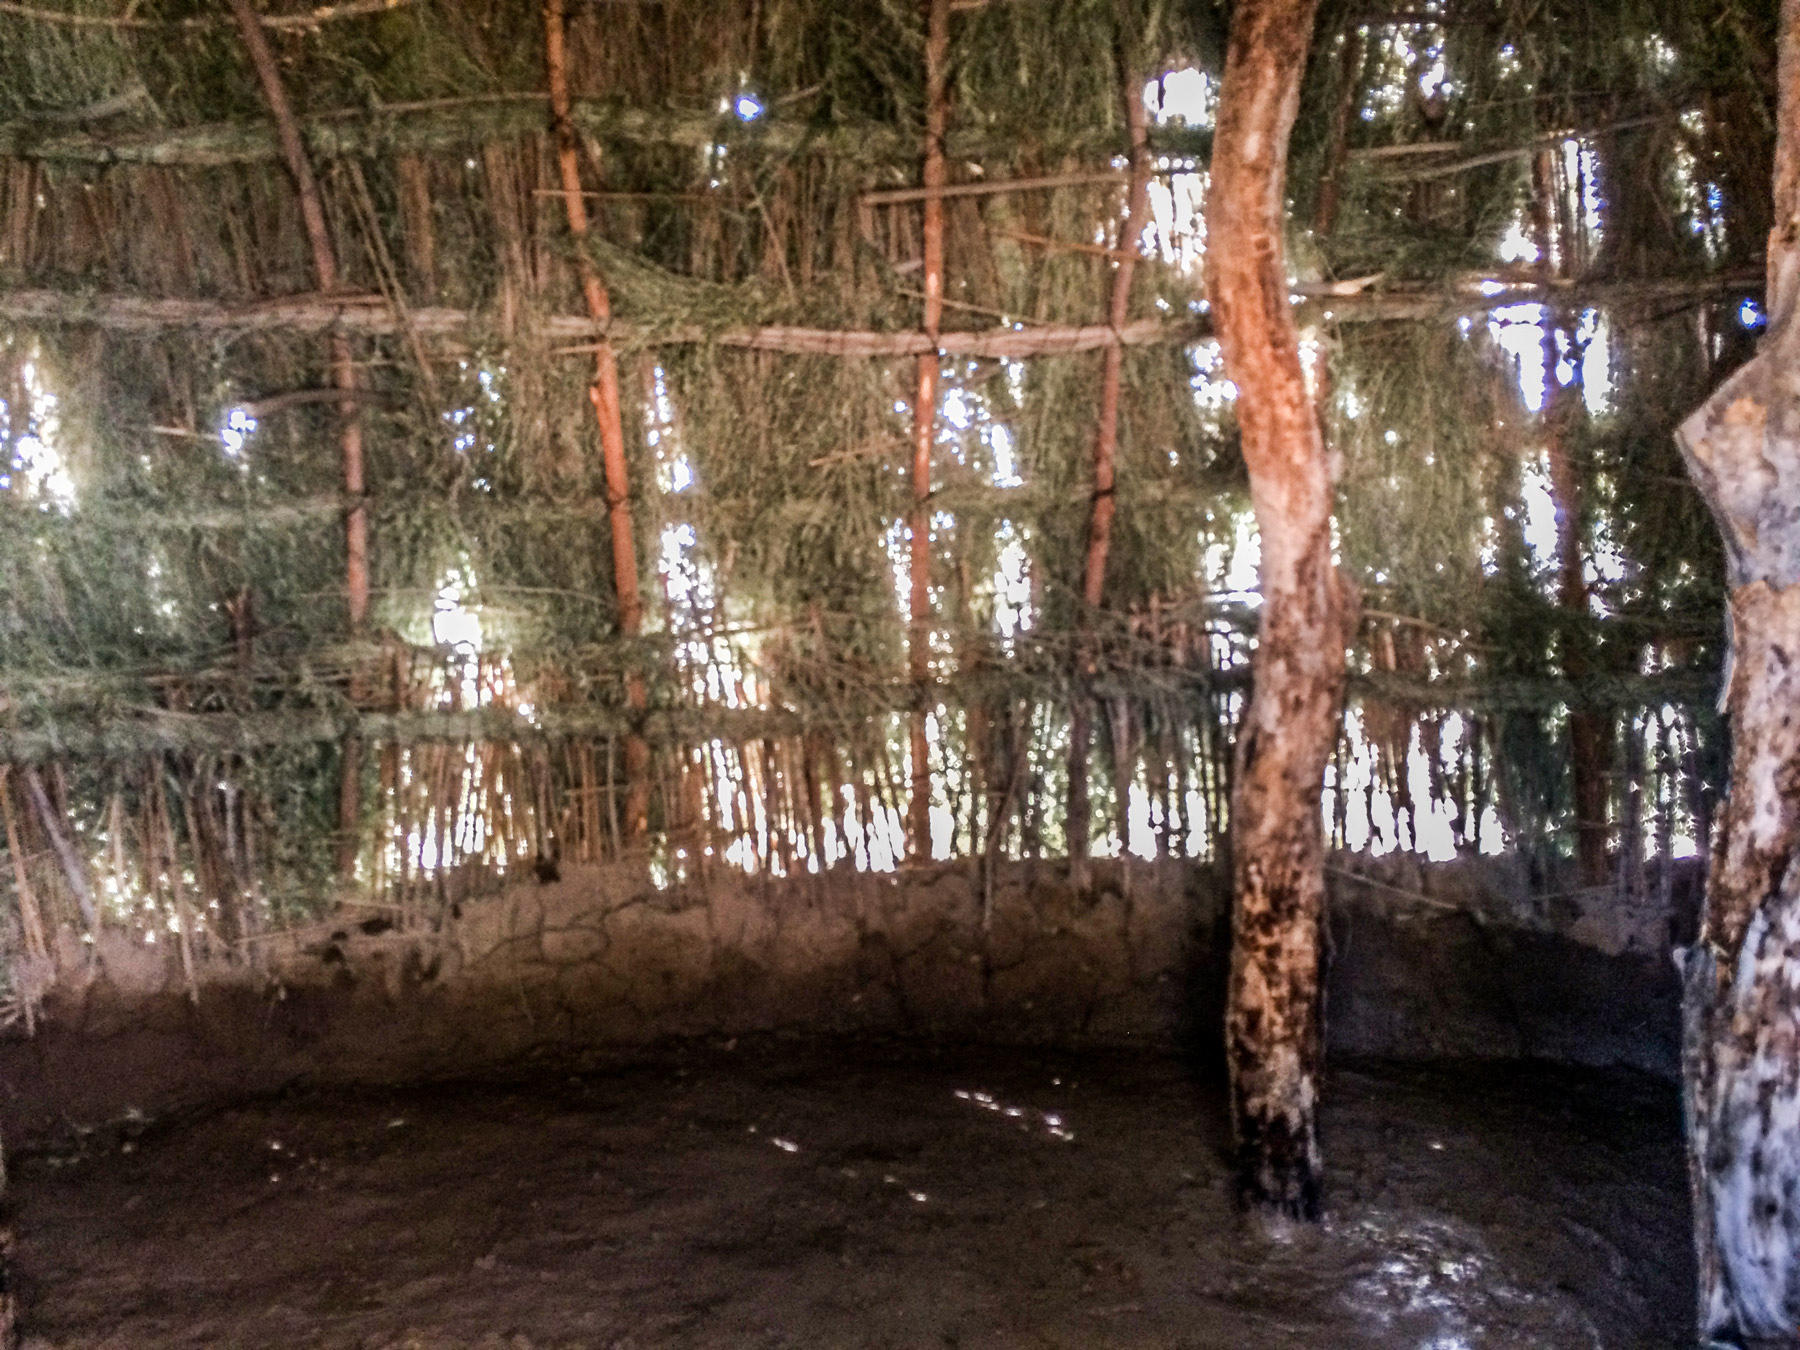
We began actual house construction on September 8. The four mesquite posts in this picture were recycled from the previous house, as they were still in good shape. We used bailing wire to tie the structural elements together. The long poles are pine poles recycled from a fence. On top, we laid cross pieces of willow and then one more long pine pole across the willow. This is the completed inner superstructure.

This is pretty close to what we think historic house construction would have looked like—without ladders and bailing wire!

This is the first band that was wired to the willow uprights. We strung four bands around the house about one foot apart. Then we wove layers of thatching through these bands.
We placed arrow weed vertically around the perimeter of the house. The mud placed over the outer thatching might have worked just fine to hold the rain out, but we took this step anyway.

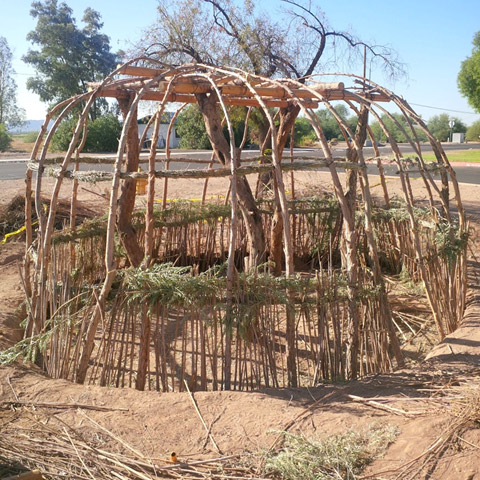
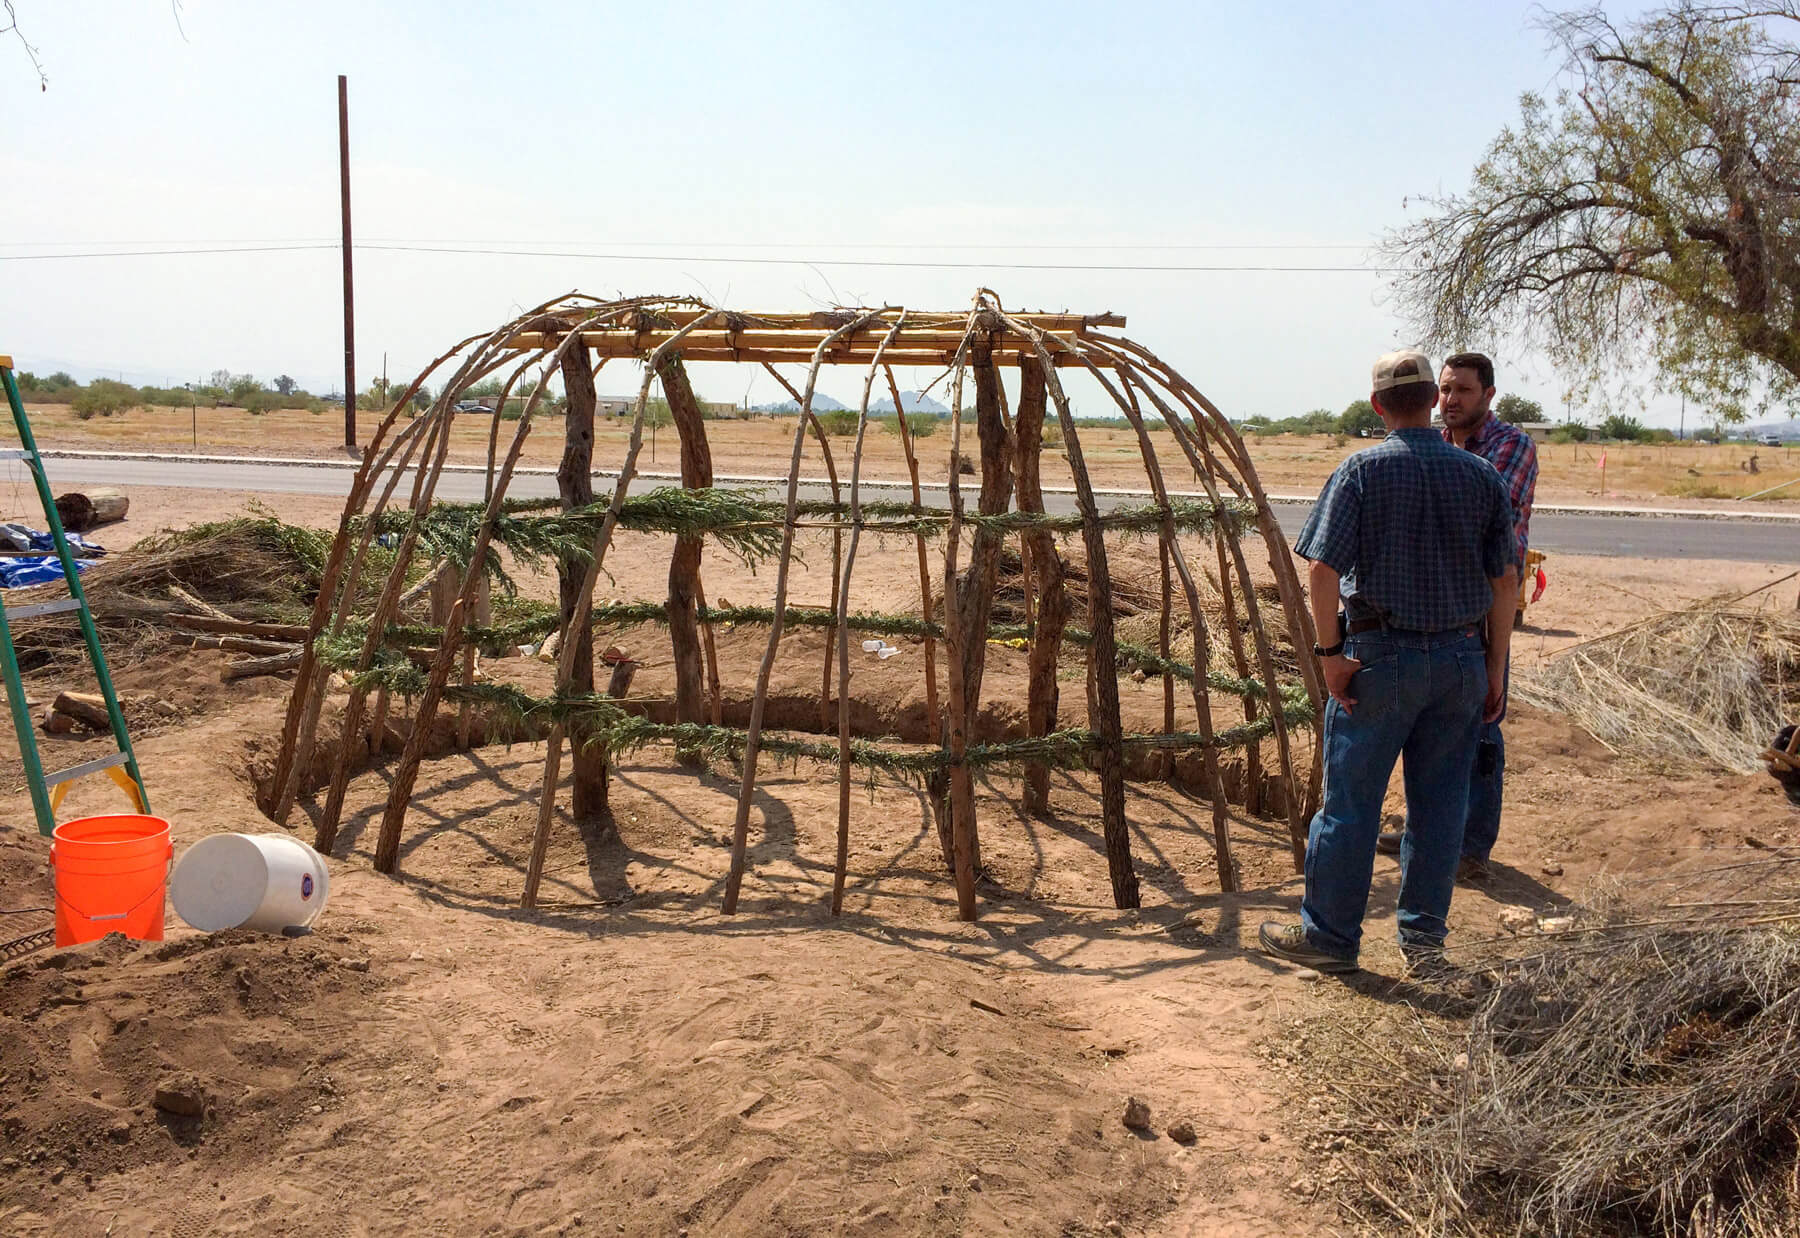
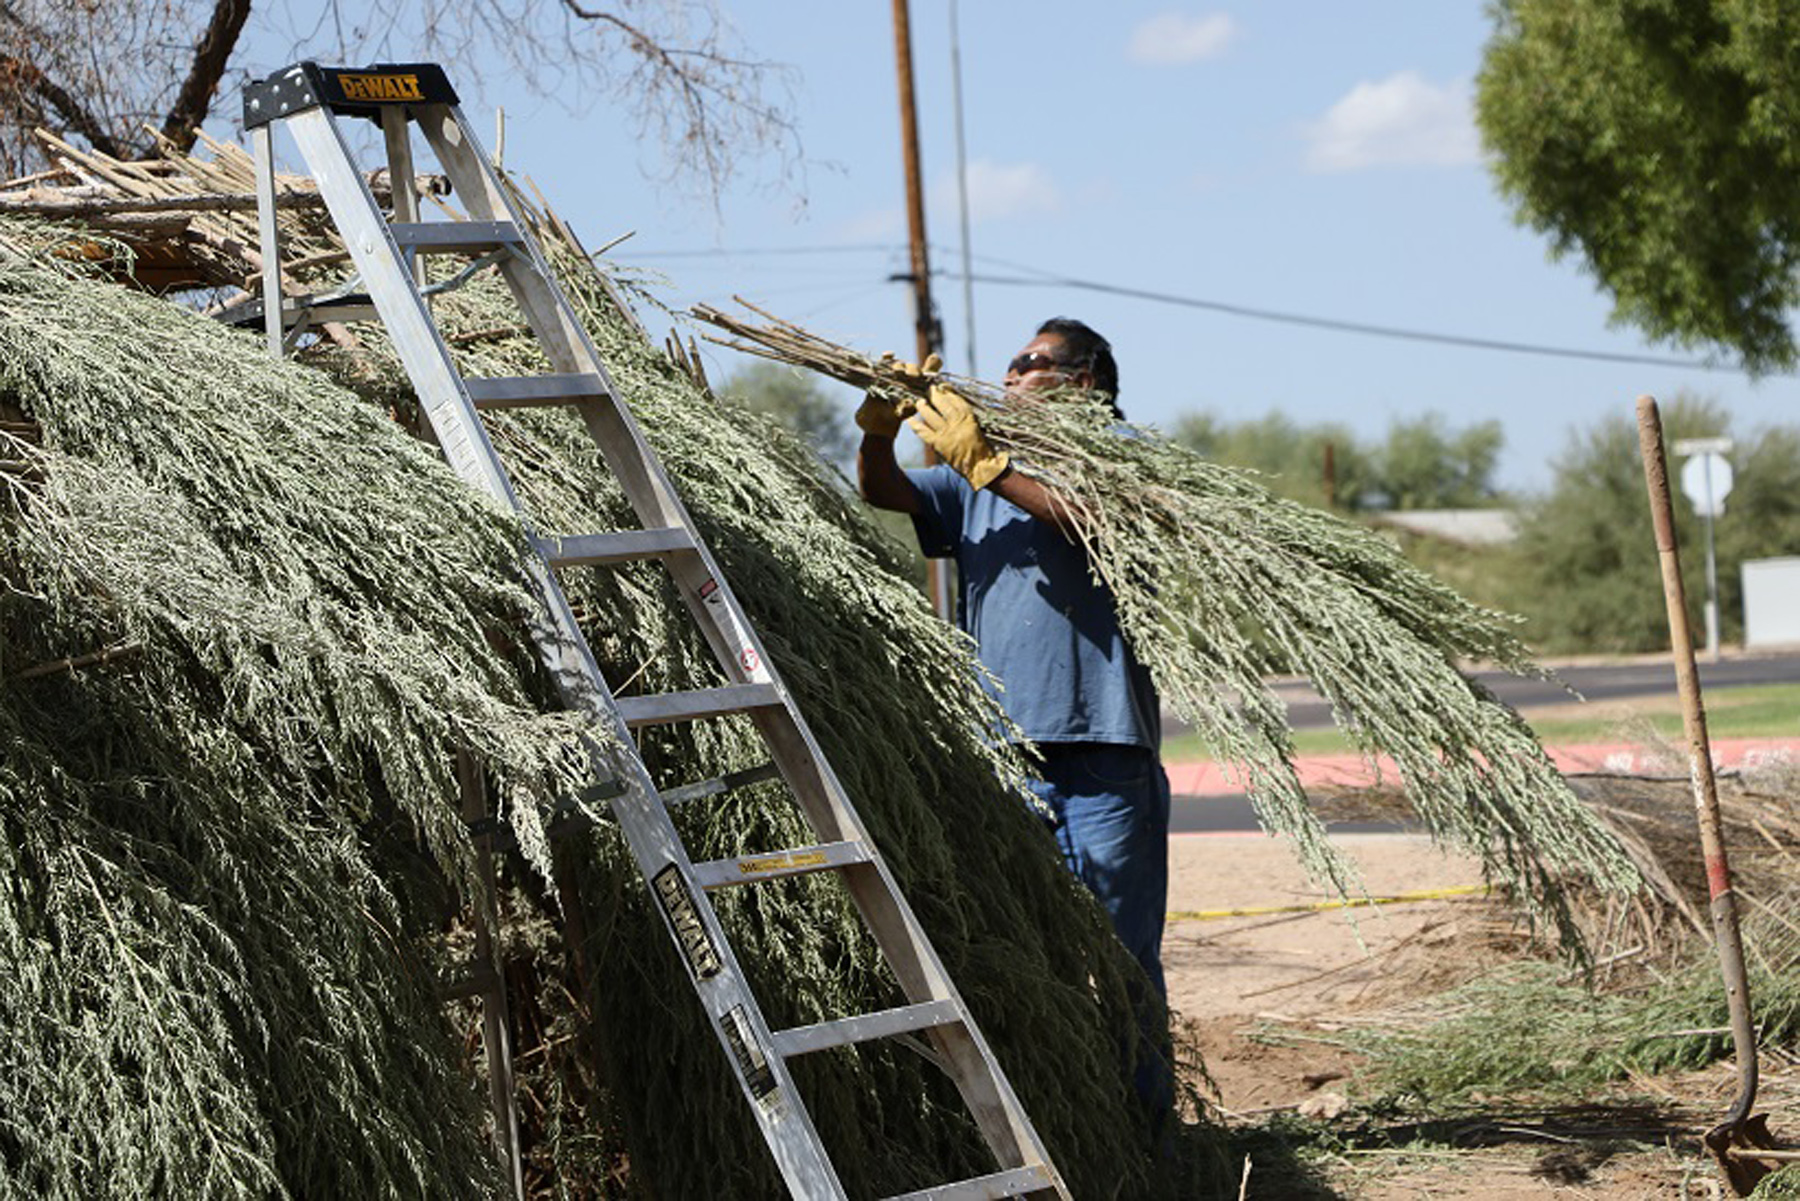
In these photos we are placing large willow uprights around the perimeter of the house and bending them over to the roof. The bands around the house parallel to the ground are made of bundled arrow weed wrapped with bailing wire. Gary came up with this technique and it worked quite well. Willow branches would also work well for this step.

Gary: Ours was once a riparian land that had a river run through it, but no longer. Our resources are very limited. We had to utilize all materials and make sure nothing went to waste. In some cases, we had to go and buy supplemental natural materials so that we wouldn’t take too much from the land at one time.

We used arrow weed, <em>U’uskokomagĭ</em> (oo-oosskauk koo-maq) to thatch the house. It grows along rivers and canals in the area. Arrow weed smells wonderful and grows very straight, and each plant has dozens of stems. When the stems dry out, the leaves stay on solidly for years. The stems are brittle, so they do not bend much more than 30 percent before they start cracking.
We used arrow weed, U’uskokomagĭ (oo-oosskauk koo-maq) to thatch the house. It grows along rivers and canals in the area. Arrow weed smells wonderful and grows very straight, and each plant has dozens of stems. When the stems dry out, the leaves stay on solidly for years. The stems are brittle, so they do not bend much more than 30 percent before they start cracking.

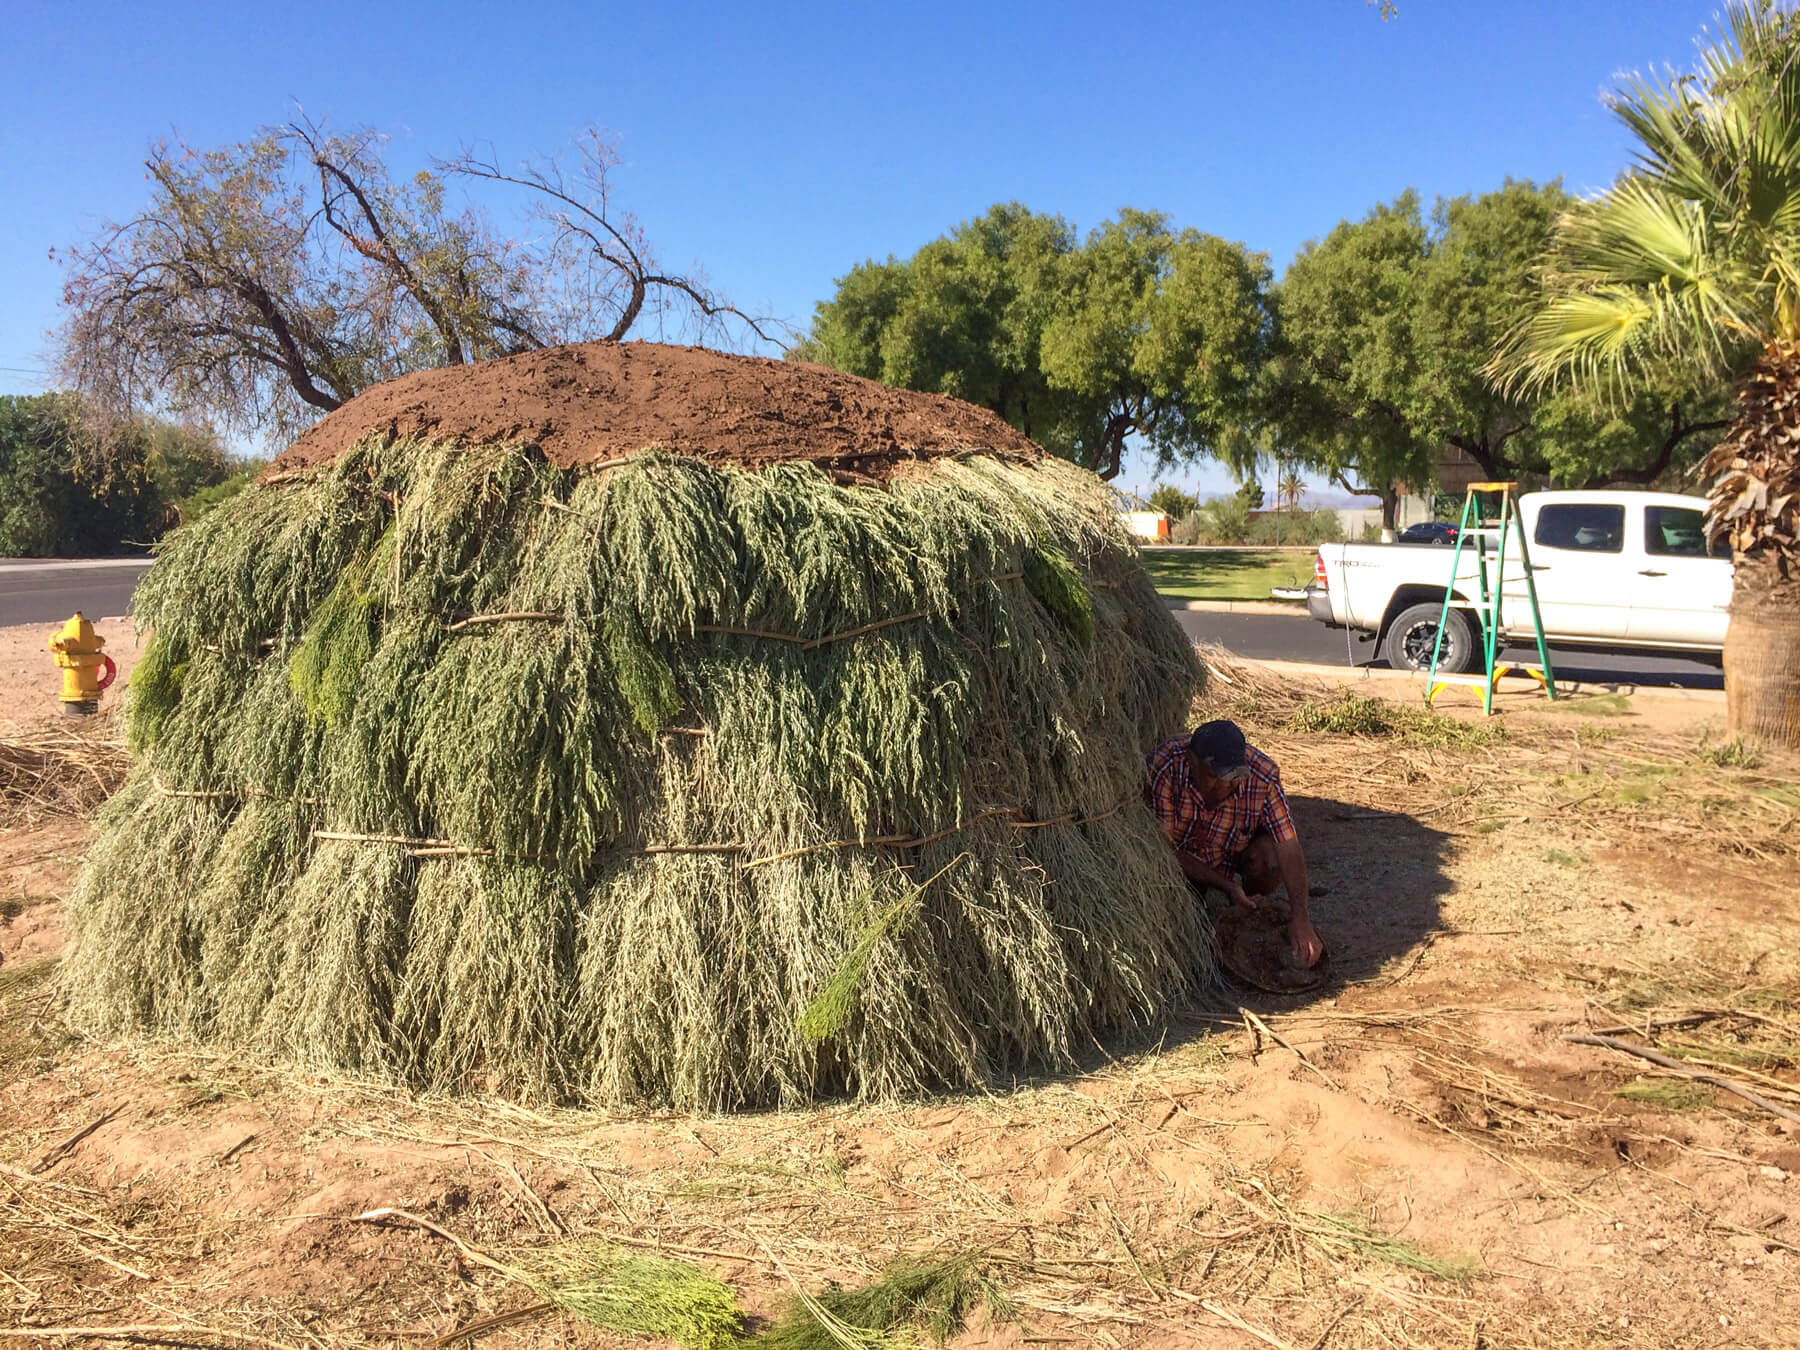
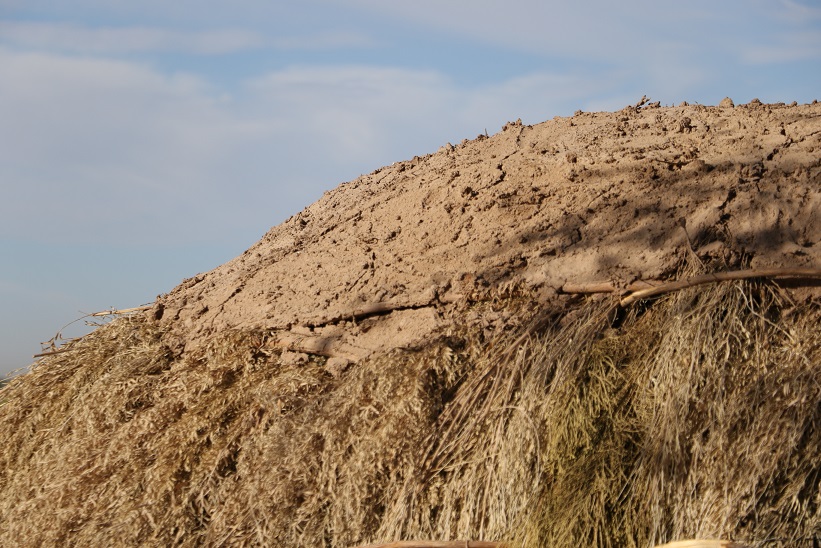
Gary: When the crew members were mixing mud in the wheelbarrow with the shovel, we tried to make it as moist as masa—a good spreading consistency. And we had heard that in order to make the earthen top, you start out lightly. Then when it rains, you add more dried dirt a bit at a time and let it build up. That way it does not get to top-heavy and list.

Gary Owens working in the pithouse entryway.
This view is from the inside looking out. The bright light spots look like holes, but they are not—these are just thinner spots in the arrow weed thatching. When this batch of arrow weed dried, we added more and thickened up those patches.
The house near completion, with the berm around perimeter almost completed. Construction of the entryway ramp is in progress. We tried to use the arrow weed to hold down the bands of thatching, but we quickly learned it was prone to break, so we switched to willow and brittle bush. These materials were flexible enough to bend around the thatching.
The roof has a thick (~ 10 cm) layer of mud. This is simply the dirt leftover from excavating the house pit.
The completed pithouse.

One thought on “Hands-On Archaeology: How to Build a Pithouse”

  1. John says:
    July 14, 2021 at 6:54 pm

    Concerning pit homes and ancient Pueblo peoples All the diagrams I see some people doing intricate work inside the house with the only source of light a cooking fire. From my experiences camping a cooking fire is pretty small and not made for light. We’re they using supplemental lighting devices like oil lamps or candles?

    Reply

Leave a Reply Cancel reply

Your email address will not be published. Required fields are marked *

Explore the News

  • Preservation Archaeology Blog
  • Press Releases/Announcements
  • Preservation Archaeology Today

Related to This

  • Post Repairing the Ki
  • Post Hands-On Archaeology: How to M...

Involved

Allen Denoyer

Related Posts

  • Repairing the Ki

  • Hands-On Archaeology: How to Make a Stone Axe

  • Hands-On Archaeology: How to Make Adobe Bricks

Want to help us? Make a donation

or take action

© 2020 Archaeology Southwest
Formerly the Center for Desert Archaeology

520.882.6946
Contact
  • Donor Portal
  • My Store Account
  • Contact Us
  • Terms of Use
  • Privacy Policy
  • Press Room