• Donate
    • Donate
    • Member Circles and Benefits
    • Become a Member
    • Renew Today
    • Give a Gift Membership
    • Student Membership
  • Take Action
    • Volunteer Program
    • Make Your Voice Heard
  • About
    • Land Acknowledgment
    • What We Do
    • Position Papers
    • Team & People
    • Job Openings
    • Partners & Friends
    • Annual Reports
    • Policies & Financials
  • Things to Do
    • Events
    • Archaeology Café
    • Exhibits
    • Classes
    • Field School
  • Explore
    • Free Resources
    • Introduction to Southwestern Archaeology
    • Projects
    • Protection Efforts
    • Ancient Cultures
    • Videos
    • Places to Visit
  • Store
    • Archaeology Southwest Magazine
    • All Products
  • News
    • Blog
    • Press Releases/Announcements
    • Preservation Archaeology Today
    • Sign up for E-News
  • Donate
    • Donate
    • Member Circles and Benefits
    • Become a Member
    • Renew Today
    • Give a Gift Membership
    • Student Membership
  • Take Action
    • Volunteer Program
    • Make Your Voice Heard
X
  • About
    • Land Acknowledgment
    • What We Do
    • Position Papers
    • Team & People
    • Job Openings
    • Partners & Friends
    • Annual Reports
    • Policies & Financials
  • Things to Do
    • Events
    • Archaeology Café
    • Speakers Bureau
    • Exhibits
    • Classes
    • Field School
  • Explore
    • Free Resources
    • SW Archaeology 101
    • Projects
    • Protection Efforts
    • Ancient Cultures
    • Videos
    • Places to Visit
  • Store
    • Archaeology Southwest Magazine
    • All Products
  • News
    • Blog
    • Press Releases/Announcements
    • Preservation Archaeology Today
    • Sign up for E-News

What’s the Point: All about Clovis Points

Preservation Archaeology Blog
  • Home
  • >
  • Preservation Archaeology Blog
  • >
  • What’s the Point: All about Clovis Points

What's the Point? Series image
This is the second post in a new series called “What’s the Point?” Allen Denoyer and other stone tool experts will be exploring various aspects of technologies and traditions.

Allen Denoyer, Preservation Archaeologist and Ancient Technologies Expert
Allen Denoyer - blog

(February 9, 2021)—In this post, I’ll explain how people made Clovis points and what is important to look at in order to recognize them. You’ll see that it’s possible to read a Clovis point like a map.

My scientific illustration of a replica point I made.

Clovis point replica made by Bruce Bradley.


Background

Over most of North America, 12,000 to 13,000 years ago, ancestral Indigenous people were making distinctive fluted projectile points known as “Clovis points.” Clovis points are easily recognized because of their large size, their exquisite craftsmanship, and the beautiful stones toolmakers chose for them. Although there are regional differences in style, the technology for making the points is the same.

Hunters used these dart points to bring down mammoths and other now-extinct large game animals. Through their mobile lifestyle, people subsisted on these and other animals, as well as plant foods.

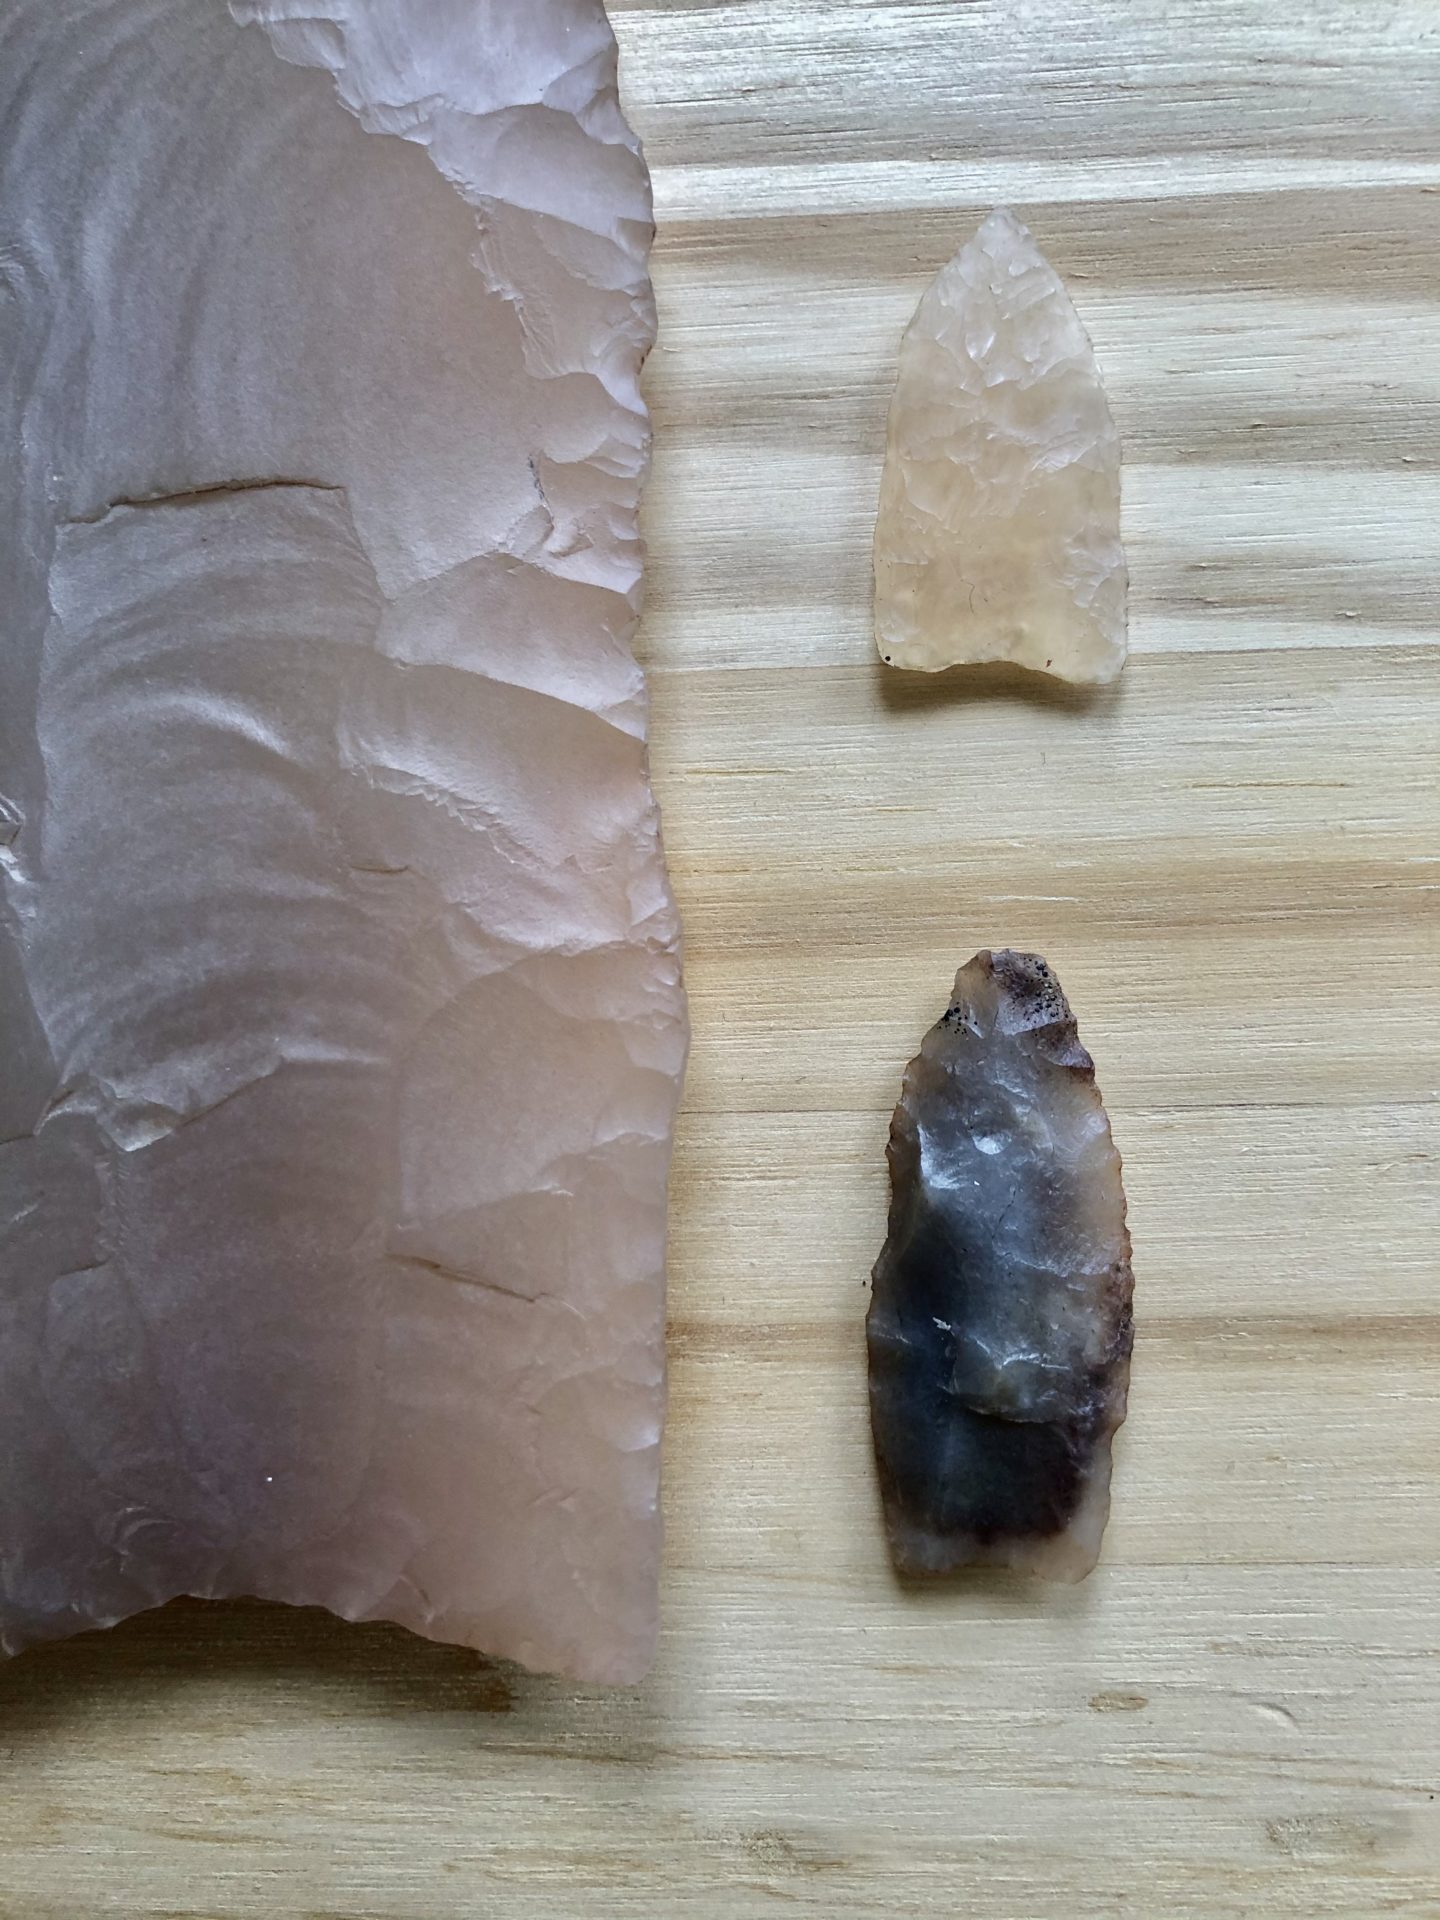
Clovis archaeological sites are rare. Points are found at single-episode kill sites, multiple-episode kill sites, campsites, in caches, and as isolated artifact finds. Campsites and caches are extremely rare finds.

Our best information on how Clovis points were made comes from caches. One cache seems to have been with a burial, but the purpose or meaning of other caches is not clear. Caches often contain earlier-stage bifaces, unused finished points, and even some reworked points. Points in a cache typically show a wide range of stone types, often from long distances apart, which suggests these people were traveling great distances to obtain high-quality stone.

Casts of three points from a cache at the East Wenatchee Clovis site in Washington state.


Casts of five points from the Fenn cache, which may have come from the area where Wyoming, Idaho, and Utah meet.

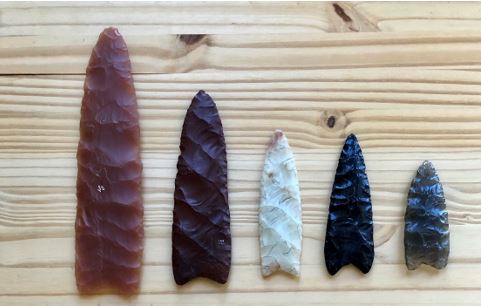
Clovis points range in size. At the time of manufacture, the average Clovis point was probably about 4 to 5 inches long. The vast majority of these points were broken when they were used, however, and re-sharpened if possible. Experts think hunters may have used the largest examples as knives or on thrusting spears to finish off an injured mammoth.

The large point is more than 8.5 inches long. It is from the East Wenatchee cache. The small white point is from the Lehner Clovis site near Herford, Arizona, and is about 1.25 inches long. The blueish one is made out of chert from Arizona’s Whetstone Mountains. It is from a private collection.


These points from Utah are good examples of what archaeologists usually find in the field. All of these points were found in campsites, which is where hunters would have changed the points out of their foreshafts. The two points in the image at right are heavily patinated, showing their great antiquity. The point at left was re-sharpened while in the haft. All are made of chert and chalcedony.


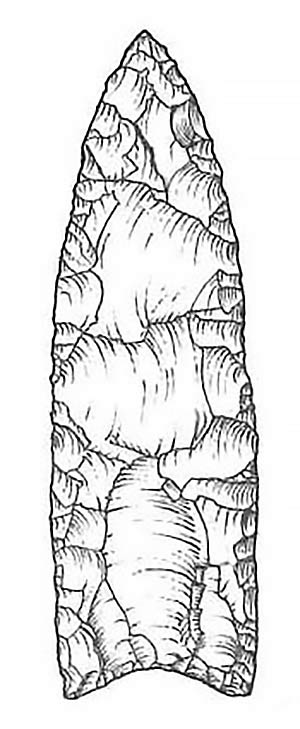
Flake Maps Reveal How People Made Clovis Points

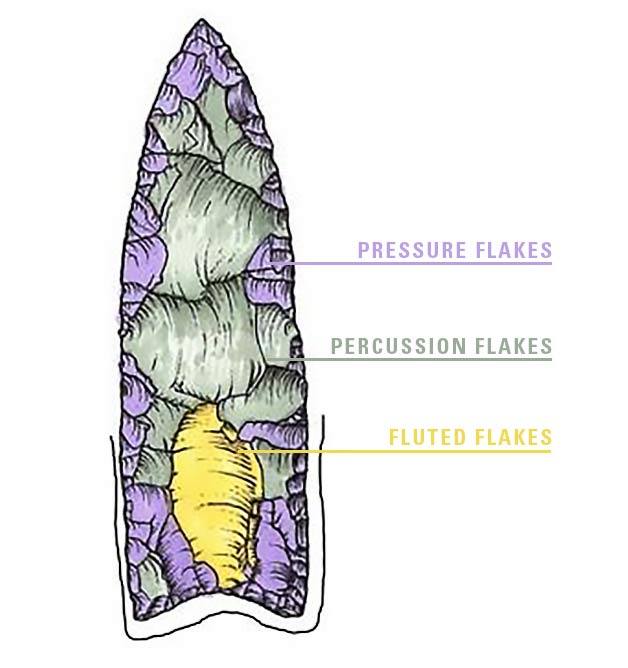
This is an illustration of a replica point that shows a lot of the flaking details you can expect to see on Clovis points. Note the colors, which will guide the following discussion.
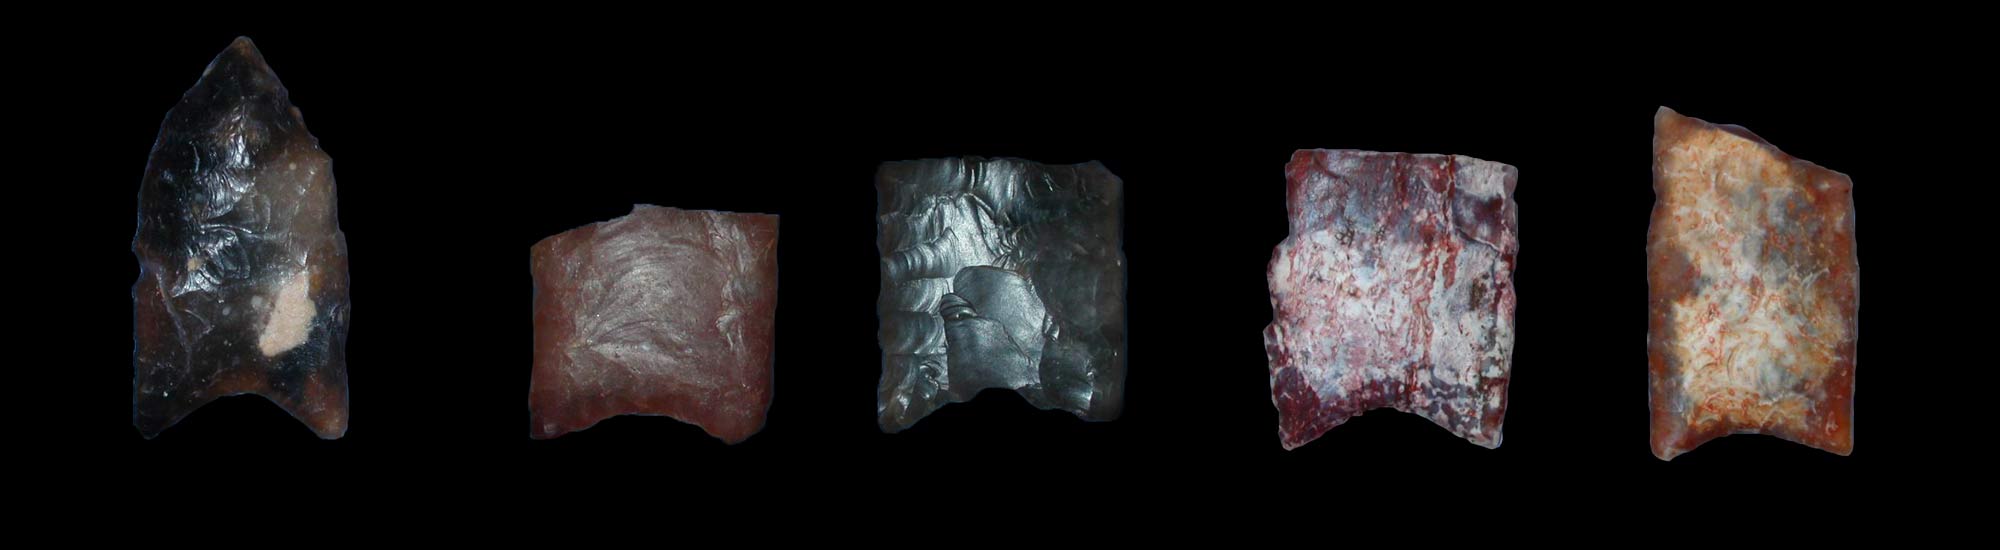
This is the map we will follow to understand how Clovis points were made.


Flute Flakes

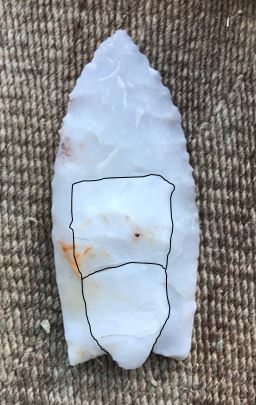
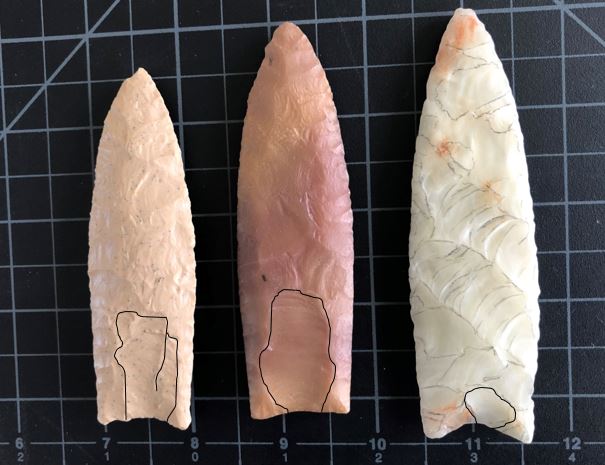
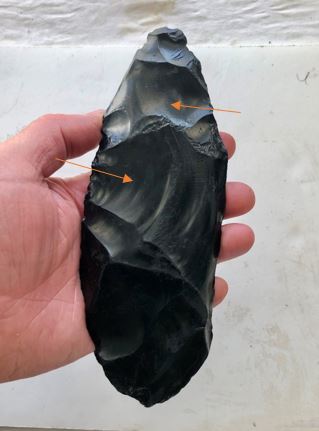
The yellow flake scar is a basal thinning flake called a flute. Both faces of a Clovis point were often fluted in the final stages of manufacture. In technological terms, this is a percussion biface thinning flake struck from the base. These flute flakes usually extend about one-third of the length of the point. The point bases were thinned for hafting.

The basal margins are heavily ground to about the length of the flutes. The black line outside the point indicates the ground area. Grinding covers the area of the point that would have been wrapped in its haft. No preserved examples of hafted Clovis points have been found.

A Clovis point I made and hafted into a wooden foreshaft. The haft is wrapped in rawhide and covered with a layer of pitch.


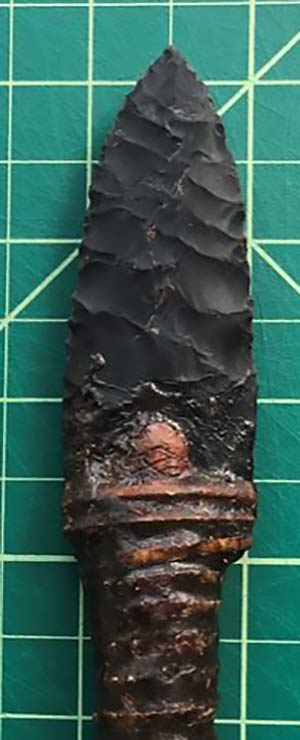
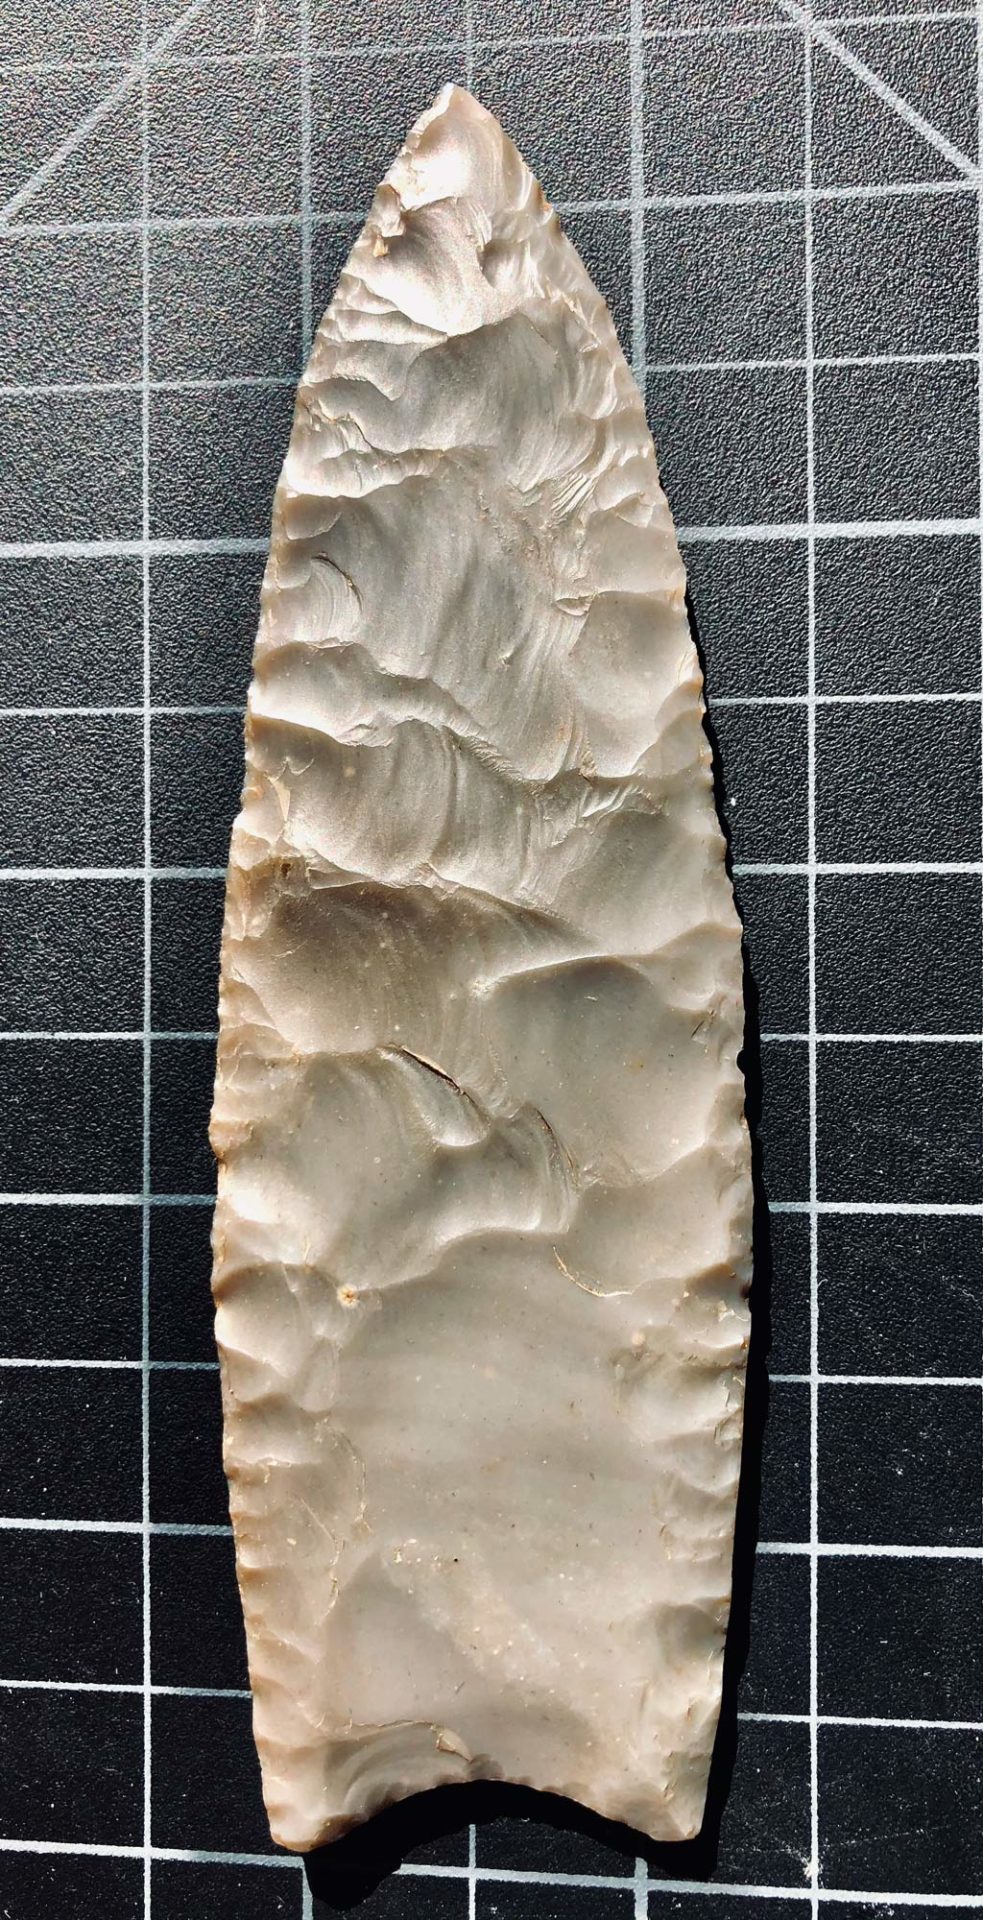
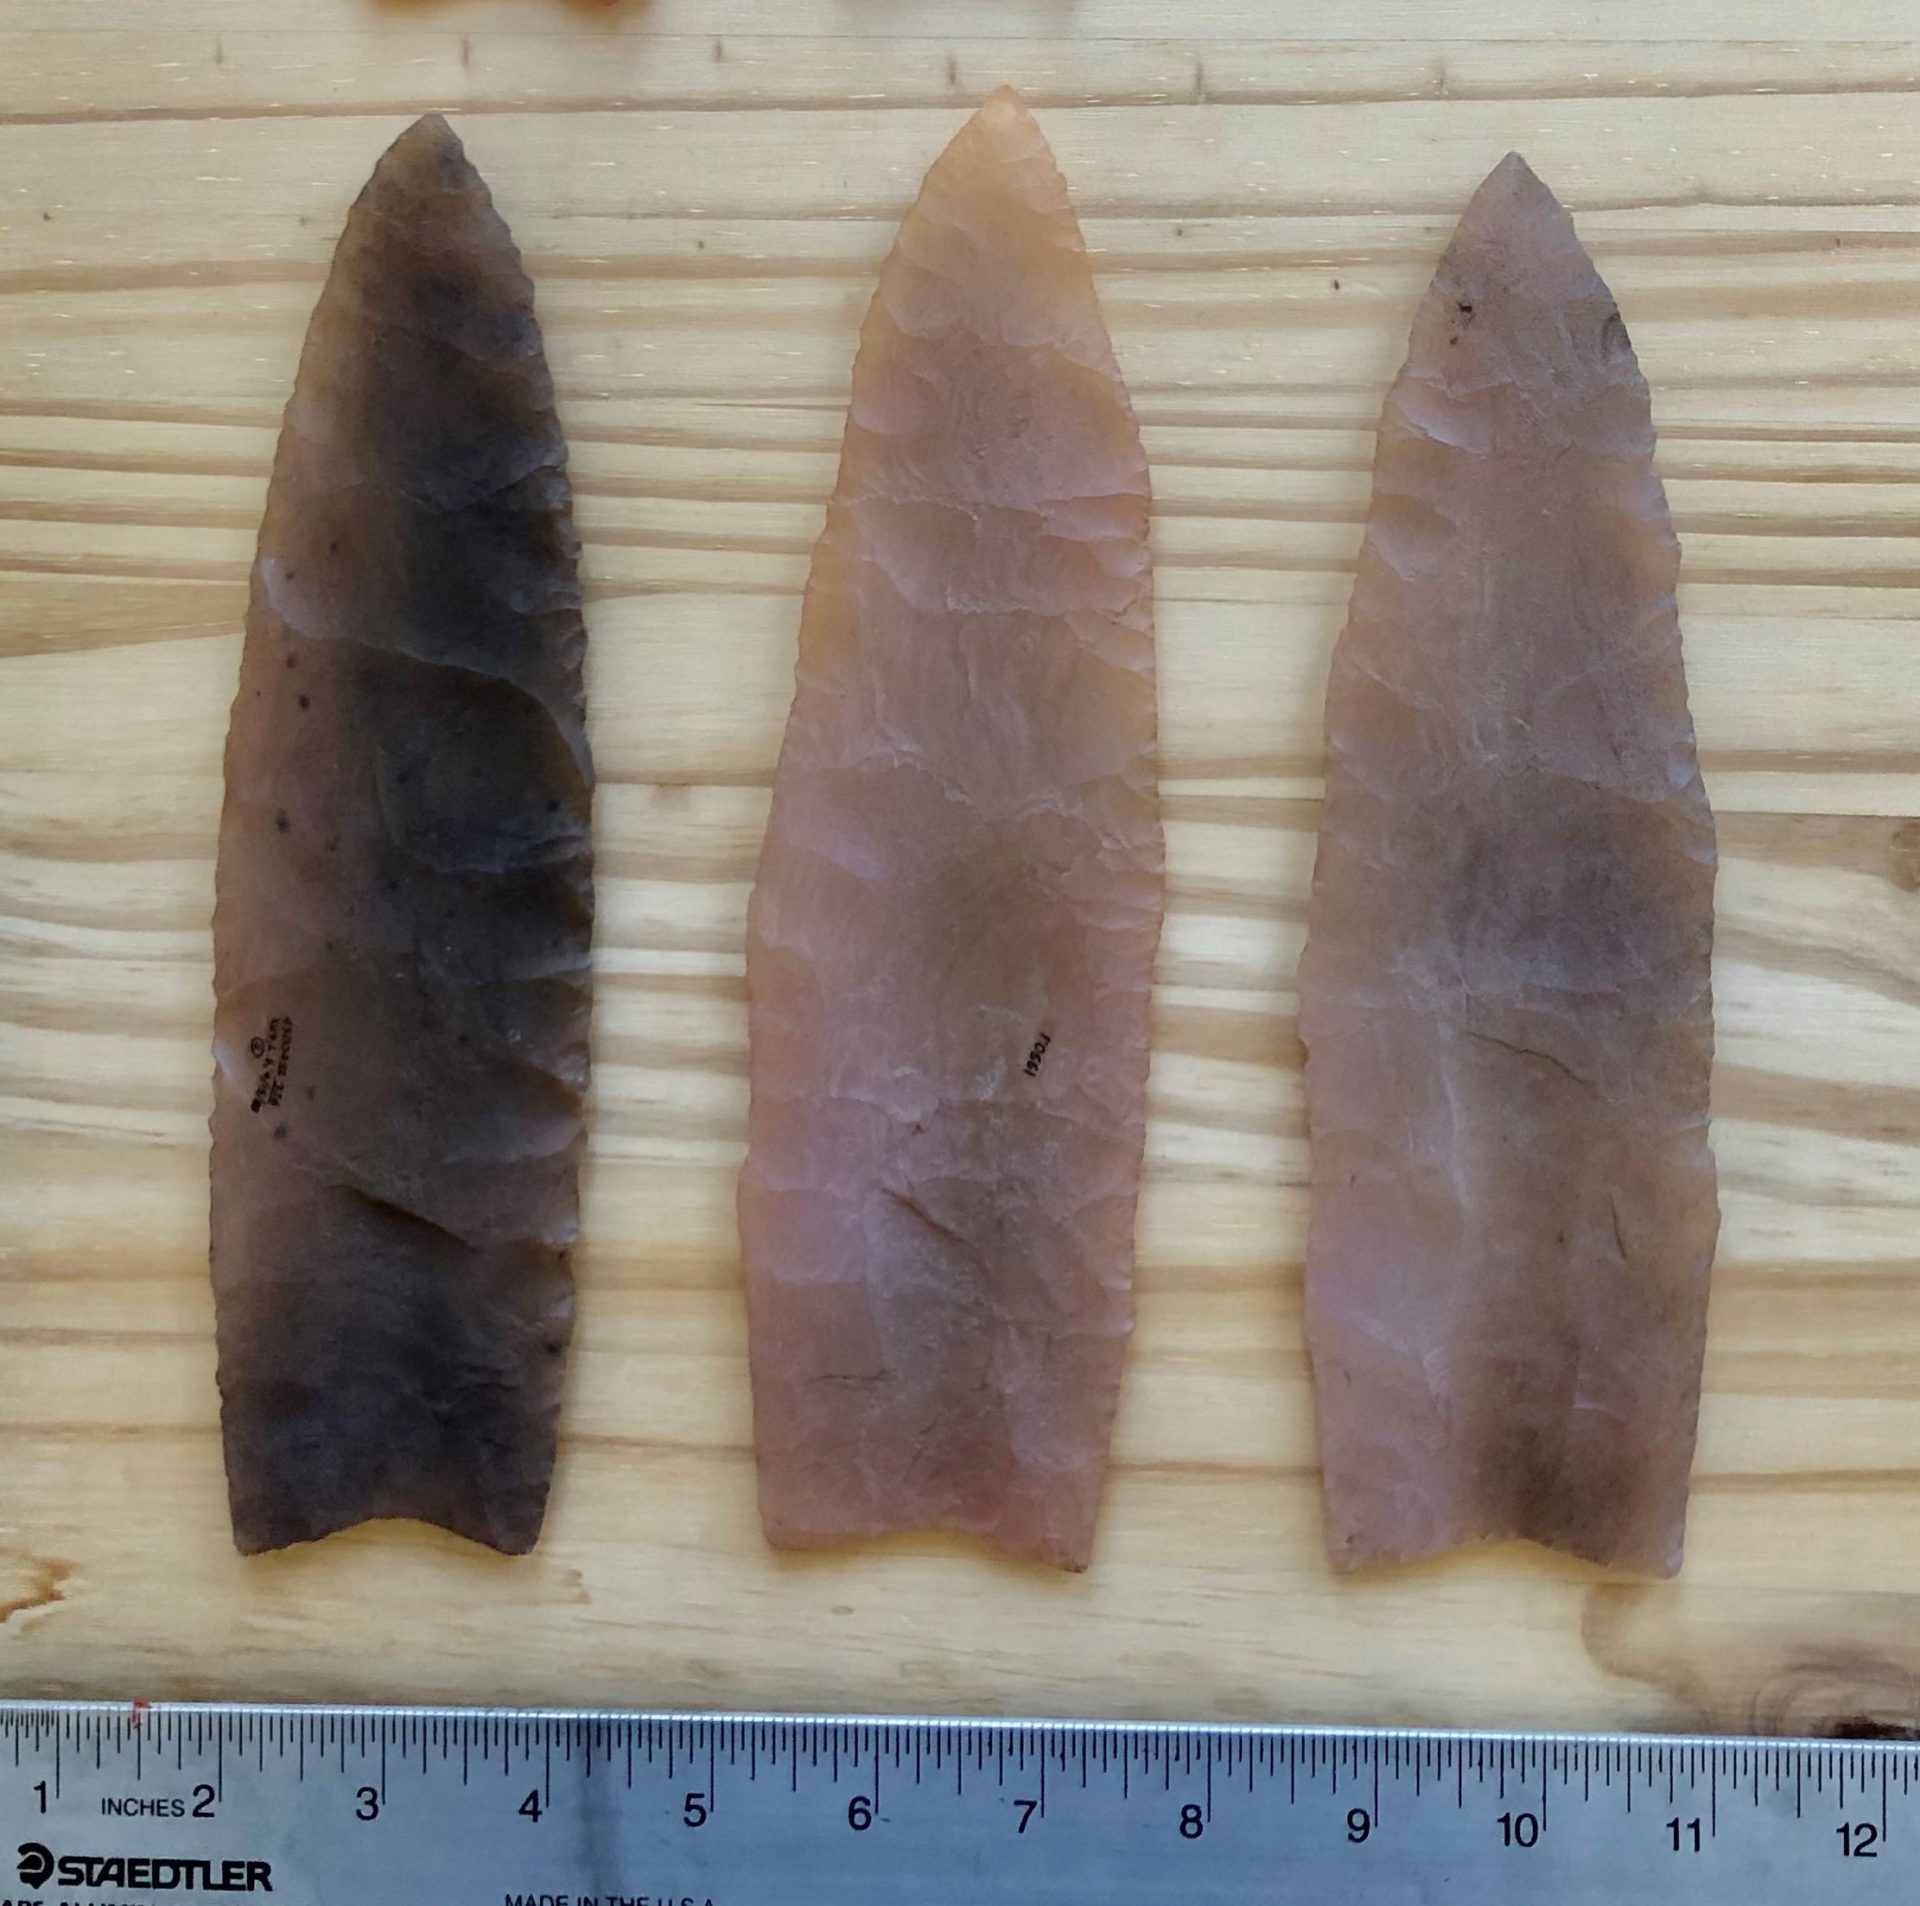
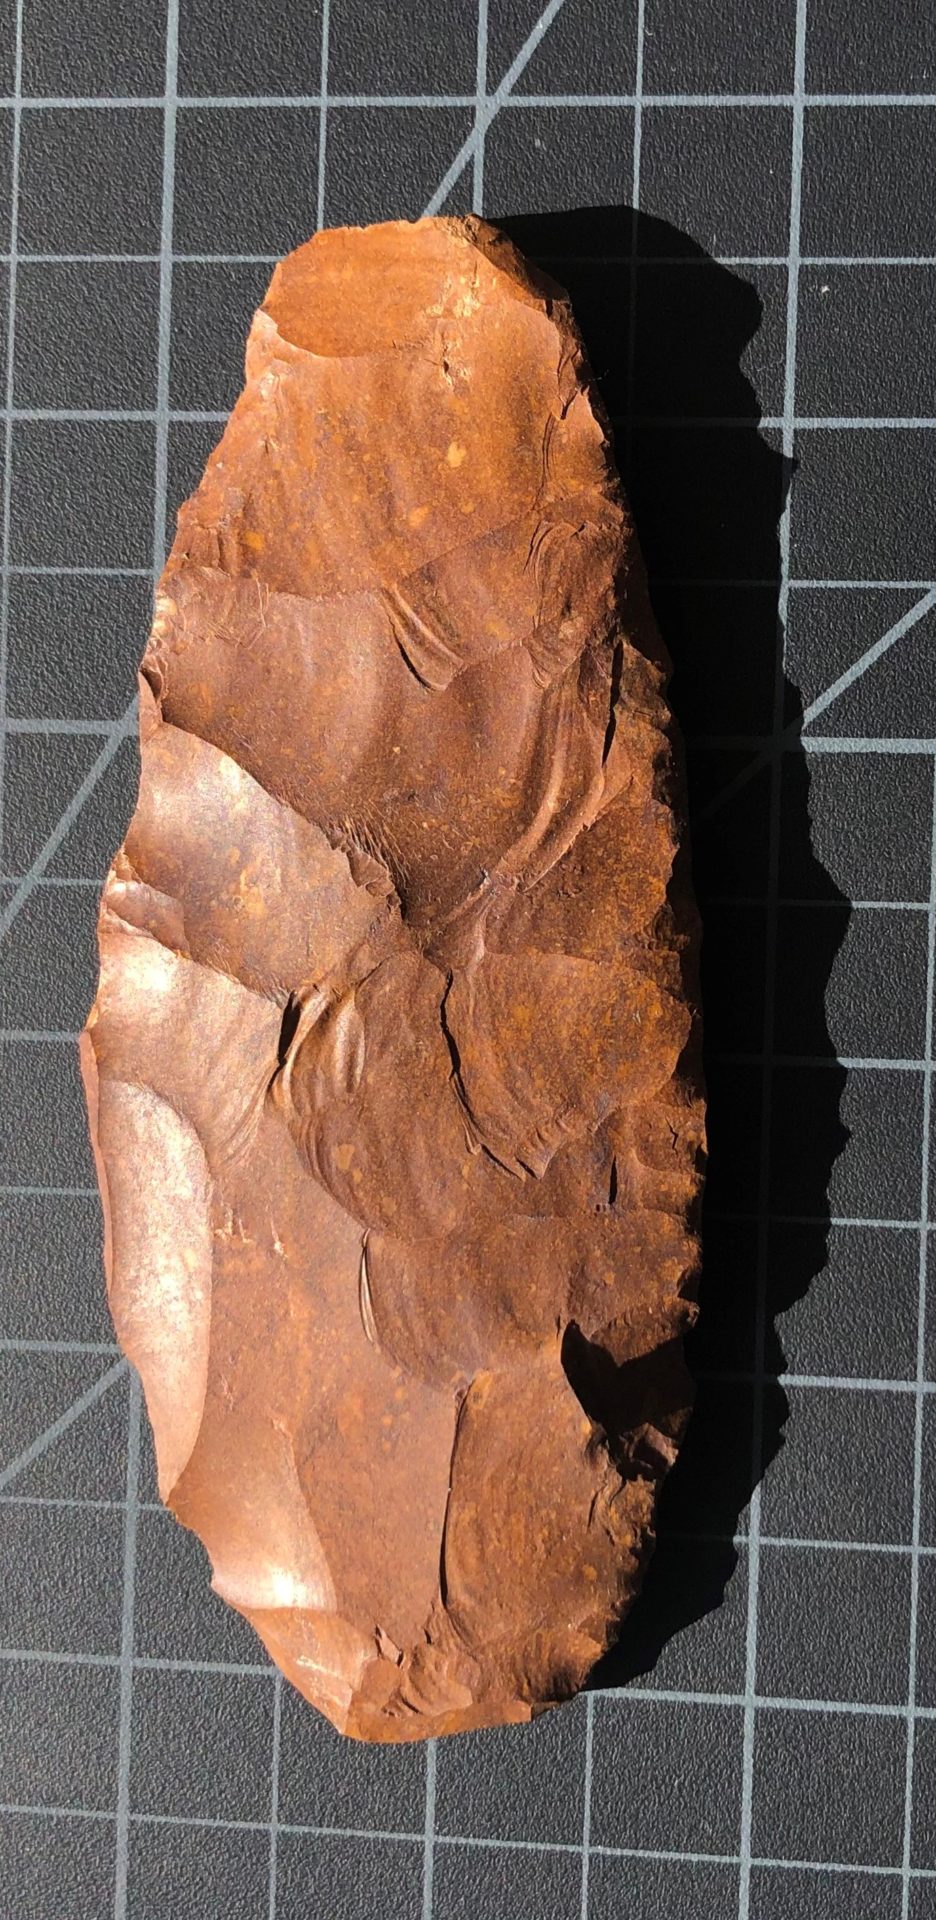
Here are some examples of fluting and flute flakes. Flute flakes are very distinctive.

Flute flake placed back on finished point. The surface flake scars are parallel to the long axis of the flake.</p>
<p>
Flute flake placed back on finished point. The surface flake scars are parallel to the long axis of the flake.

These are resin casts. There are several companies that sell such casts, and they are a great way to study these points when you don’t have access to the originals. From left: Cast of a point from the Naco Mammoth kill site, Arizona; cast of a point from St. Clair County, Illinois; and a cast of a point from the Fenn cache. Notice how the flutes vary on these points.


Percussion Flakes

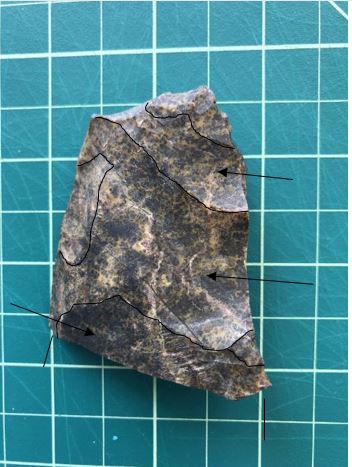
The light green flakes are called percussion flakes. These were struck during the earlier stages of manufacture, using an ivory or antler tool (which flintknappers call a billet). Those strikes left broad flake scars across the biface. The wide spacing between flakes allowed faces to be thinned with only three or four flakes, sometimes.

People used early-stage bifaces as cores for striking the large flakes that would become points and tools. Overshot flakes travel all the way across bifaces and remove some of the margin on the opposite side of the biface. This is a common thinning strategy in Clovis.
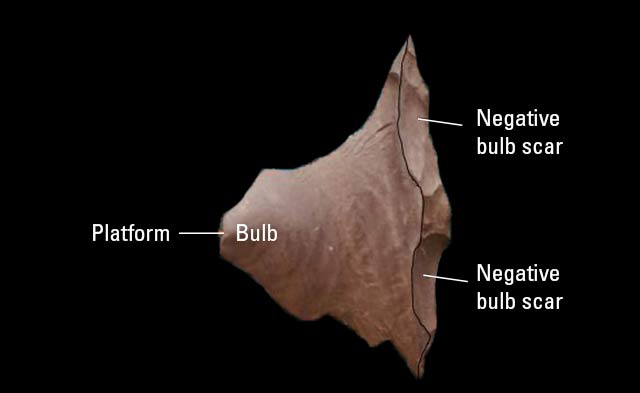
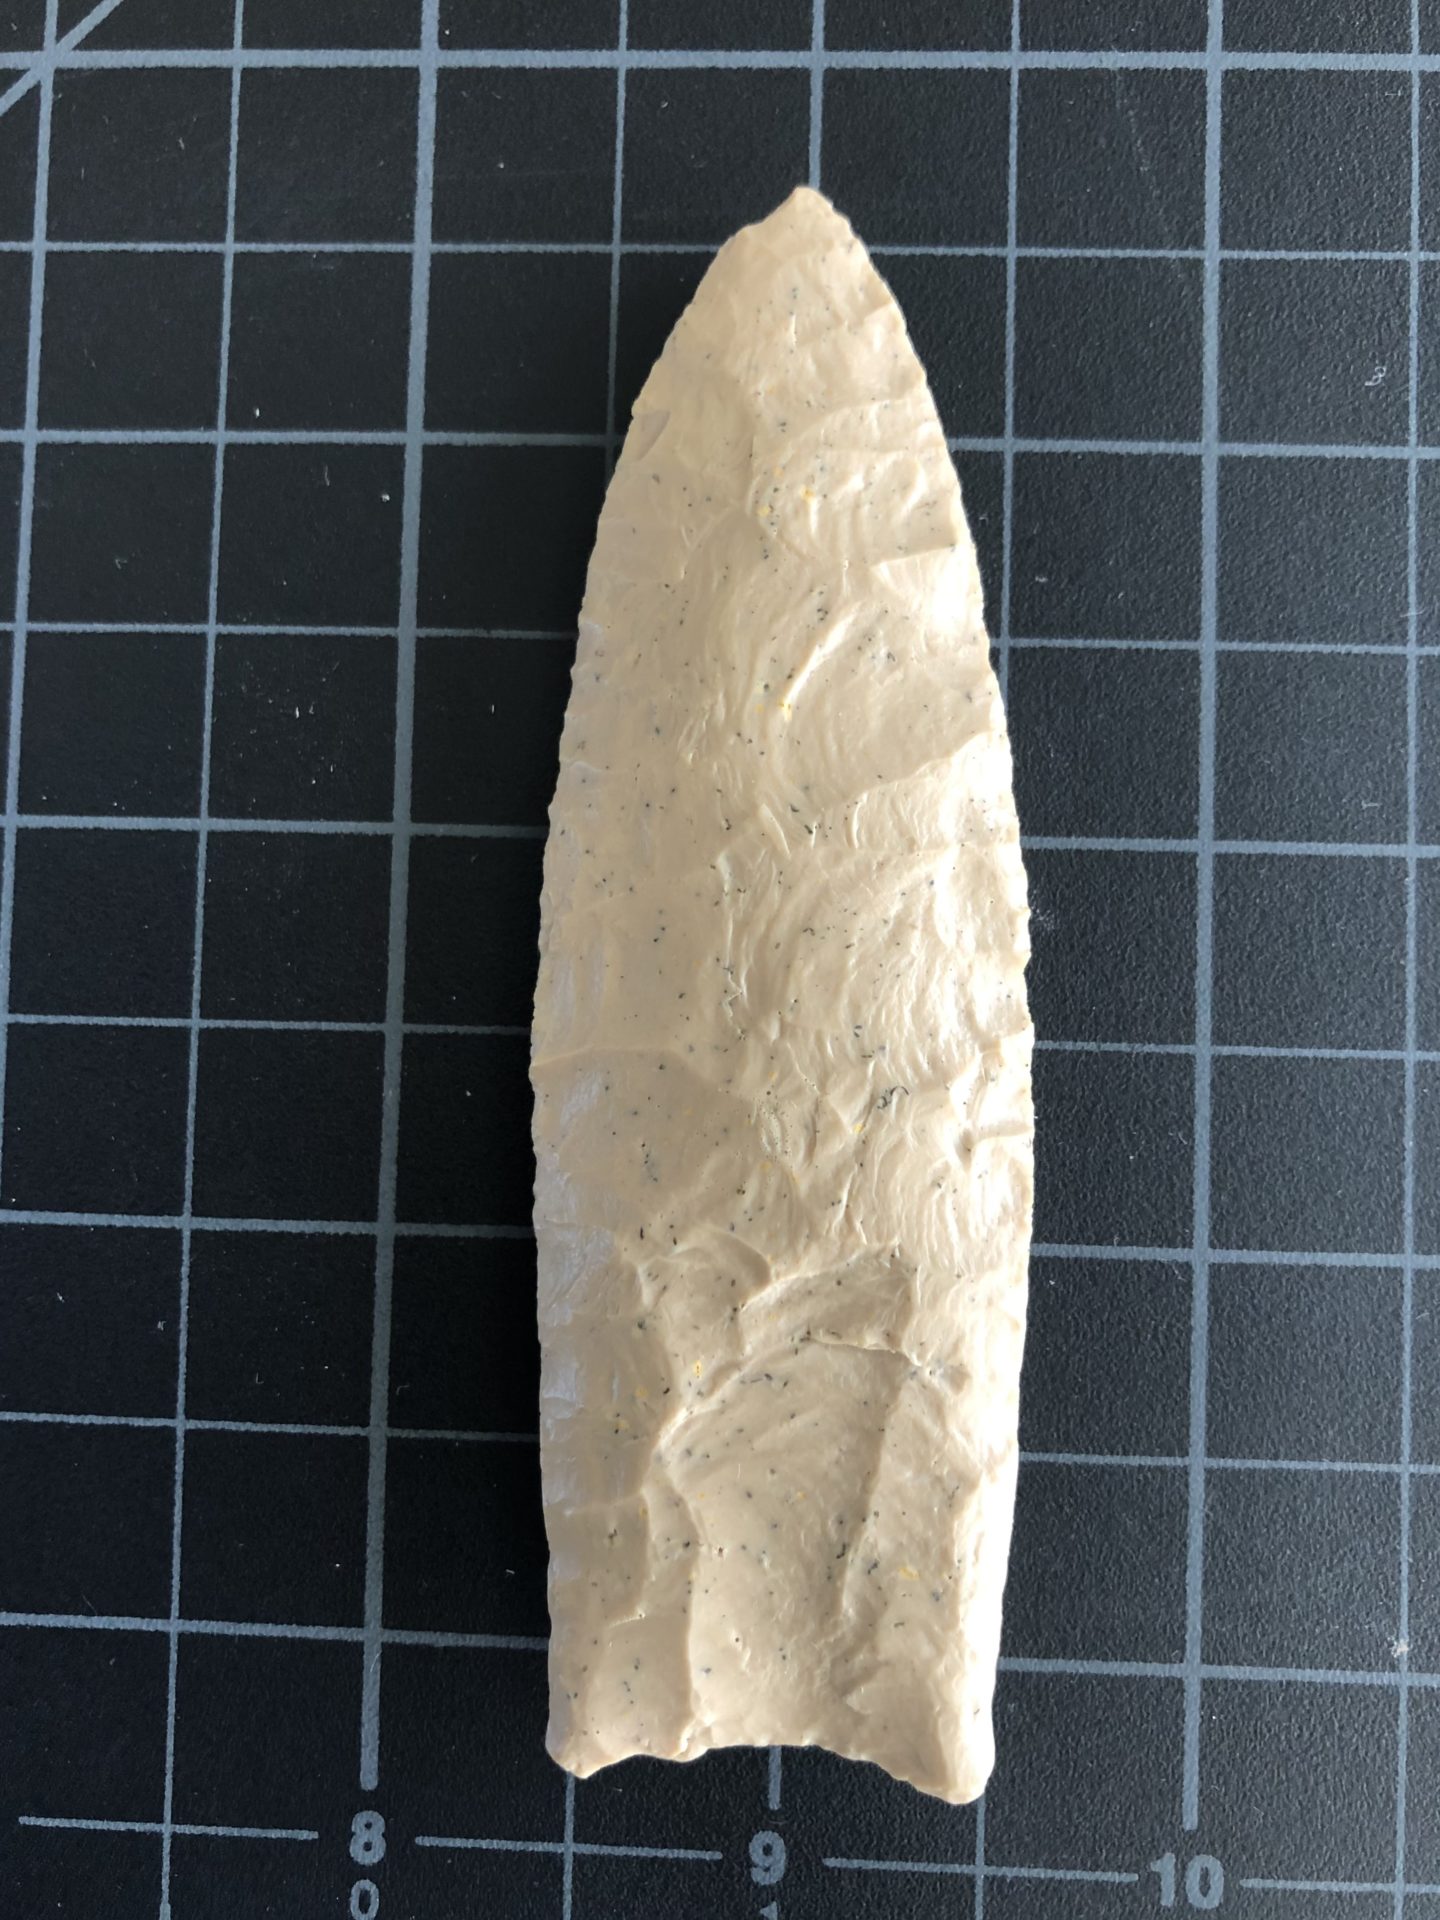
Replica of an early-stage biface.

Early-stage biface from the Fenn cache. Arrows indicate overshot flake scars (the negative of the flake).

Half of a Clovis biface from Colorado. Arrows indicate overshot flake scars.
Replica artifact showing overshot technology. This is a biface in production. The arrow shows the negative of the overshot flake. You can also see the section of the biface edge that was removed by the full-length flake.
Replica artifact showing overshot technology. This is the overshot thinning flake from the biface above. The right side of the flake is the opposite side of the flake edge removed when the flake went across the biface.

Pressure Flakes

The purple flakes are pressure flakes from the final finishing work on the point. Some points show very little pressure flaking, and others show much more extensive pressure flaking.

It appears that Clovis points often started out mostly percussion flaked. Through use and reshaping, they came to have have more extensive pressure flaking across their surfaces. Clovis knappers took care to preserve the flute scars, and did not pressure flake across them if they could help it.

The final step was the heavy grinding to margins of the base. This was done to all finished points, and is a good indicator that the maker considered the point to be finished.

This Clovis point from Naco, Arizona, is quite thick. It has extensive pressure flaking across its surfaces. This seems common among points found at the Naco, Murray Springs, and Lehner mammoth kill sites. These sites are all from the same area along the San Pedro River in southern Arizona. It is likely they are all from a single group of hunters utilizing this area for a period of time, probably hunting the last herds of mammoths in the area.


12 thoughts on “What’s the Point: All about Clovis Points”

  1. Sharon Miller says:
    February 9, 2021 at 6:55 pm

    Doggone it, Allen Denoyer, we’d better get back to having your flintknapping classes soon or I’m gonna go crazy. Someday–SOMEDAY–I’m gonna get good enough to at least do a passable Clovis point–one that doesn’t start out at four inches and end up one-half-inch.

  2. Julia Fonseca says:
    March 1, 2021 at 6:22 pm

    Very helpful diagrams! Thanks for sharing your knowledge.

  3. LAWRENCE says:
    September 10, 2021 at 8:30 pm

    GOOD STUFF!!

    1. Cassandra joe says:
      October 23, 2023 at 9:50 am

      I have found a perfect Clovis point. The one u only have resin cast of, but a real one

  4. Tim Webb says:
    September 12, 2021 at 9:31 am

    Are the flutes symmetrical on both sides? Having about the same shape and length? Are true points exhibit wear or polishing by erosion or wear?

  5. Kevin says:
    December 9, 2021 at 6:47 pm

    Do you have any pictures of the tools used to make the Clovis point. I would like to compare them to the store tools that I have found

  6. Allen Denoyer says:
    December 10, 2021 at 9:10 am

    For question 4
    The flutes on Clovis points tend to match up pretty well, but there is tons of variation. You can have one face with a really nice flute, while the other side barely has one at all. Some have multiple basal thinning flakes on them. Clovis points can be reworked and most of the flute scars get obliterated.
    If the point was on the ground surface for a long period of time, many of the stones they are made out of will weather and develop a patina on them.
    Some stone weathers very fast and dramatically.
    Clovis knappers ground the basal edges of there points heavily, this is not weathering.
    I hope this helps.

  7. Matt Krall says:
    January 10, 2022 at 5:46 pm

    Is it possible to find a clovis point that has no basal grinding. I may have one.

  8. Jim Pence says:
    April 20, 2022 at 9:27 pm

    Can you tell me if a Clovis point can be double ended, or no flute? I would like to send you a picture of an arrowhead found in northwest Arizona

  9. Alicia Zee says:
    November 24, 2022 at 12:51 am

    Hmm…I just stumbled on your article, and looking at the pictures and descriptions, I believe I have what I’d always thought to be a large spearhead, but now think that it may in fact, be a very large Clovis point. It’s about 9″ x 3″ and entirely whole. It was given to me by my late mother several years ago, who had found it on her property at the southernmost tip of Baja California Sur, in Mexico. Could you offer a suggestion as to how I might be able to have it authenticated?

  10. Frank P. says:
    March 9, 2023 at 12:19 am

    I once ran into you on the Tiger chert quarries. I recently found a great methed to make Clovis: Get 2 slats of oak 10 to 12cm long, shapped as if cut from a yardstick. Pitch glue 2 wood buttons onto one end of each board. Wrap the tip of preform in leather then sandwich it between the boards and wrap tight with string. The buttons at the base end, Then flute. It stops endshock completely. Good luck.

  11. Russ Buhrow says:
    January 12, 2024 at 6:20 pm

    I have a Clovis point that I found close to 60 years ago on a glacial sand dune in northwest Ohio. I have full data for it but don’t know if there is a clearing house / organization doing this work collecting data?

Comments are closed.

Explore the News

  • Preservation Archaeology Blog
  • Press Releases/Announcements
  • Preservation Archaeology Today

Related to This

  • Post What’s the Point: Making...
  • Project Hands-On Archaeology
  • Post What’s the Point: Folsom Tec...
  • Post What’s the Point? Atlatl...

Involved

Allen Denoyer

Want to help us? Make a donation

or take action

Cyber SouthwestRespect Great BendHands-On ArchaeologySave History

© 2025 Archaeology Southwest

520.882.6946
Contact
  • My Store Account
  • Contact Us
  • Terms of Use
  • Privacy Policy
  • Press Room